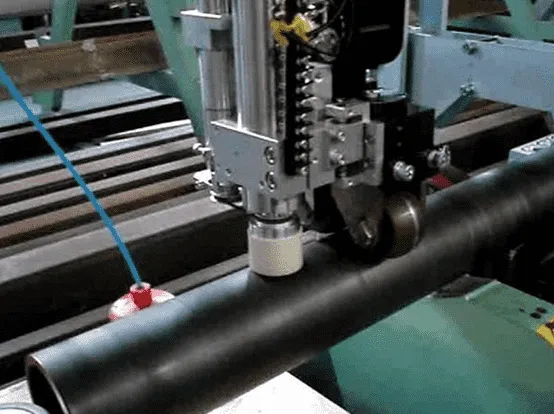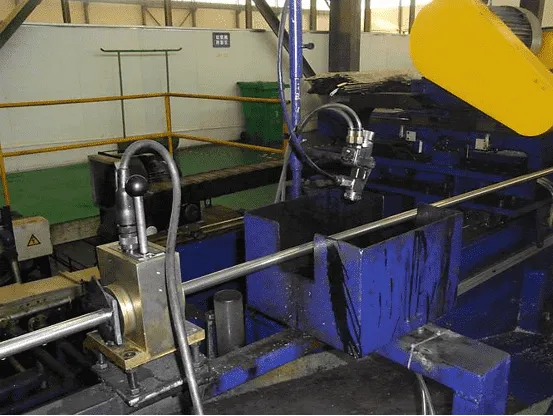
In the production and use of seamless pipes, flaw detection is a crucial step in ensuring product quality and safety. As a fundamental material in the industrial field, the quality of seamless steel pipes directly affects equipment safety and service life.
Eddy current testing is mainly used for
surface and near-surface flaw detection. Through-type eddy current testing
primarily detects transverse defects and delamination. Eddy currents can also
be used for thickness measurement, hardness, strength measurement, diameter
measurement, and distance measurement. Acceptance levels are A and B.
Acceptance level A can be used as an alternative to water pressure tightness
testing, while acceptance level B is negotiated between the supplier and the
buyer and specified in the contract. Sample pipes include drilled holes
(through holes) and longitudinal grooves.

Eddy current testing is suitable for
detecting surface and near-surface defects in seamless steel pipes made of
conductive materials.
When an alternating magnetic field
approaches a conductive seamless steel pipe, eddy currents are generated inside
the pipe. If defects exist on or near the surface of the seamless steel pipe,
they will affect the distribution and magnitude of the eddy currents. The
presence of defects is determined by detecting changes in the eddy currents.
Fast detection speed, enabling automated
inspection; high sensitivity for surface and near-surface defects; capable of
inspecting seamless tubes made of various conductive materials.
Qualitative and quantitative analysis of
defects is relatively difficult; poor inspection results for seamless tubes
with complex shapes; limited detection depth.
Internal and external wall cracks,
longitudinal cracks, transverse cracks, network cracks, stress corrosion
cracks, fatigue cracks, manufacturing defect cracks, weld heat-affected zone
cracks, service damage cracks, buried cracks, etc.
Pitting depth, uniform corrosion area,
local thinning, erosion pits, selective corrosion, crevice corrosion, microbial
corrosion, weld corrosion, heat-affected zone corrosion, wall thickness
reduction rate, etc.
Inclusions, delamination, folds, porosity,
looseness, white spots, coarse grains, segregation, forging cracks, rolling
defects, etc.
Incomplete fusion, incomplete penetration,
undercut, weld beads, concave or convex welds, misalignment, excessive weld
reinforcement, weld cracks, porosity, and slag inclusions.
Nominal wall thickness, minimum remaining
wall thickness, average wall thickness, wall thickness reduction, ellipticity,
out-of-roundness, local thickening, corrosion allowance, wall thickness
distribution map, wall thickness variation rate, etc.
Subcutaneous cracks, near-surface porosity,
delamination, folds, near-weld defects, heat treatment cracks, grinding cracks,
quenching cracks, extrusion cracks, near-surface corrosion, etc.
Coating thickness, coating peeling, coating
porosity, lining fit, lining cracks, anti-corrosion layer damage, lining
thinning, coating adhesion, lining corrosion, interface defects, etc.
Pipe outer diameter, pipe inner diameter,
curvature, straightness, ellipticity, circumference, cross-sectional shape,
beveling angle, pipe end preparation, length deviation, etc.
Electrical conductivity, magnetic
permeability, hardness, grain size, heat treatment state, material grade
identification, microstructure, non-metallic inclusions, decarburized layer,
hardened layer depth, etc.
Remaining service life, safety status,
damage level, failure risk, applicability, inspection cycle, maintenance
recommendations, service life prediction, risk level, conditions for continued
use, etc.
Through-type eddy current testing is the most widely used method for eddy
current testing of steel pipes. It is generally used for steel pipes with a
diameter less than 180mm. Its advantages include fast testing speed, the
ability to inspect the entire surface of the steel pipe, and relatively simple
equipment adjustment and operation.
Rotating point probe eddy current testing
is an automated flaw detection method where a network of point probes rotates
around a steel pipe, while the pipe moves linearly. The point probes are placed
inside a rotating head, and the probes rotate to scan the surface of the steel
pipe.
The rotating point probe method is more
suitable for inspecting small to medium diameter steel pipes. The point probes
have high sensitivity and are suitable for inspecting steel pipes with
relatively smooth surfaces. It is not suitable for hot-rolled steel pipes,
steel pipes with oxide scale, or other rough surfaces.
ISO 15549, ISO 15548-1, ISO 15548-2, ISO
12718, ISO 20669, ASME BPVC SJianCeion V, ASME B31.3, ASTM E309, ASTM E571,
ASTM E1316, EN 1711, EN 13860-1, EN 13860-2, JIS G 0588, GB/T 12604.6, GB/T
14480, GB/T 26953, GB/T 26954, GB/T 28705, GB/T 28706, GB/T 32538, GB/T 32565,
GB/T 34361, GB/T 34634, GB/T 38894, JB/T 4730.6, JB/T 6912, NB/T 47013.6

Capable of simultaneous multi-frequency
excitation and signal processing, it can simultaneously detect defects of
different depths, suppress interference signals, and improve the
signal-to-noise ratio. Suitable for defect detection and classification under
complex working conditions.
Utilizes far-field eddy current technology
to detect defects across the entire wall thickness of ferromagnetic pipes.
Unaffected by the skin effect, it can detect defects on both the inner and
outer walls of pipes, suitable for oil and gas pipeline inspection.
Composed of multiple detection coils
arranged according to specific rules, it can cover a large detection area at
once, improving detection efficiency and generating two-dimensional or
three-dimensional images of pipe defects for easy defect location and
assessment.
Performs magnetic saturation treatment on
ferromagnetic materials to eliminate the influence of changes in material
permeability on eddy current detection, improving detection accuracy and
reliability. Suitable for pipes made of magnetic materials such as carbon steel
and alloy steel.
Integrating an eddy current testing system
and an automated movement device, this robot can autonomously move and inspect
pipes inside, suitable for long-distance, large-diameter, and inaccessible
pipelines.
Utilizing digital signal processing
technology, this system filters, amplifies, performs phase analysis, and
displays impedance planes on the detection signal, improving defect
identification and quantitative accuracy.
Specially designed for pipeline inspection
in high-temperature environments, this equipment features high-temperature
resistant probes and cables, allowing for online inspection while the system is
running, minimizing downtime.
Includes various types such as absolute
probes, differential probes, reflective probes, and through-type probes,
optimized for different pipeline specifications, materials, and inspection
requirements.
Enables precise positioning and uniform
speed movement of the probe on the pipeline surface, ensuring comprehensive and
consistent inspection coverage. Suitable for rapid inspection of large batches
of regularly shaped pipelines.
This system collects, stores, and processes
inspection data in real time, generates inspection reports, establishes a
pipeline inspection database, enables historical data comparison and trend
analysis, and supports pipeline integrity management.
In conclusion, eddy current testing plays a crucial role in the production and quality control of
seamless pipes. It can improve product quality, ensure production safety,
and optimize production processes, thus possessing significant practical
application value.