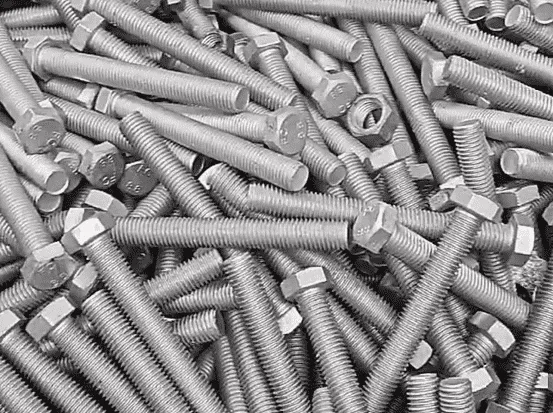
Pipe bolts are critical connecting elements in various major structures, widely used in bridges, pressure vessel flanges, wind turbine towers, crane connections, offshore platforms, and steel structure nodes. During service, they are frequently subjected to thermal stress, differential expansion, alternating loads, impact, vibration, and environmental corrosion, which can lead to:
Fatigue cracks;
Stress corrosion cracking (SCC);
Deformation and loosening;
Localized damage to the threaded area;
Corrosion thinning.
If these defects are not detected in time,
they may lead to major structural failures. Therefore, periodic non-destructive
testing (NDT) of pipe bolts is crucial. This article will focus on Phased Array
Ultrasonic Testing (PAUT), which has become increasingly widely used in recent
years.
Phased Array Ultrasonic Testing (PAUT) is a powerful non-destructive testing (NDT) method that uses advanced sound beam manipulation to detect flaws in materials with high precision and flexibility.
Unlike conventional ultrasonic testing, which relies on fixed-angle probes,
PAUT employs an array of small transducer elements that can be individually
controlled to steer, focus, and scan ultrasonic beams electronically. This
enables rapid inspection, improved detection capability, and detailed imaging
of internal structures—especially valuable for complex
components or critical welds.
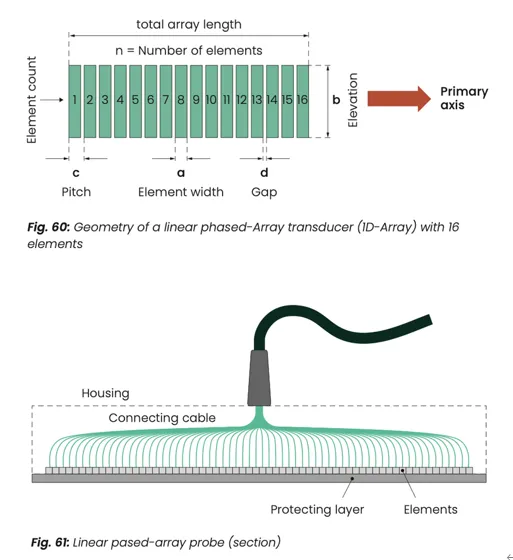
By subdividing the piezoelectric transducer
into many small transducer elements and using an ultrasonic instrument capable
of individually controlling and evaluating each of these elements temporally,
it becomes possible to modulate the interference pattern of the sound beam to
achieve a desired sound pressure distribution that is optimal for a specific
application.
By exciting the elements at different
times, the phase of the elementary waves of the individual elements is
influenced, thus giving rise to the term “Phased Array.” In German, the term “Gruppenstrahler” (group radiator) is also used, as a group of n transducer elements
is always ex- cited with a specific time delay pat- tern, the so called “delay law”. This is not a physical law but
rather a sequence of delay times calculated by the instrument, relative to the
individual elements of the group, intended to achieve a specific characteristic
of the sound beam.

Confirm pipe bolt size, material, and
service environment; select appropriate probes and wedges; create a scanning
plan (angle, focus point, inspection area).
Calibrate the material sound velocity and
wedge delay; set the sensitivity (DAC/TCG) to ensure the equipment is in a
repeatable and accurate state.
Clean the pipe bolt surface; lightly grind
if necessary; apply coupling agent to ensure good acoustic energy coupling.
Sector scan (S-Scan) covers the head,
transition area, and threaded area.
E-scan enhances thread inspection.
TFM imaging can be used for higher
resolution if needed.
Determine the presence of cracks,
corrosion, and inclusions; measure crack length, depth, and direction to
determine if they affect operational safety.
Save the S-Scan/TMF images; record
parameters and probe position; provide recommendations for repair, replacement,
or continued monitoring.
1. PAUT provides excellent visualisation on
any fatigue associated defects.
2. PAUT has significant advantages over
current manual UT techniques: reproducible, fast, full data storage, auditable,
interpretable locally or remotely.
3. Total focusing method (TFM) can also be
used within the PAUT set-up to provide.
4. Higher resolution and image quality
enhancement.
5. Better sizing of defects located on
threads.
6. Improved probability of the detection of
defects.
Phased Array Ultrasonic Testing (PAUT) has
become the preferred technology for monitoring the integrity of pipe bolts in
critical structures because it can detect defects that are difficult to find
with traditional ultrasonic testing (UT), provides image-based displays for
easy understanding and assessment, can detect complex geometric areas such as
threads and roots, and the testing process is repeatable and traceable.
Combined with TFM (Total Mechanical Fluid Mechanism), it can achieve precise
quantification of millimeter-level cracks. PAUT provides a more advanced and
reliable structural health assessment method for industries such as bridges,
cranes, wind power, marine engineering, and pressure vessels.
PAUT Bolt Inspection Procedure
1. Pre-inspection Preparation
2. Equipment Calibration
3. Surface Treatment
4. PAUT Scan
5. Defect Analysis
6. Result Recording and Reporting

Benefits of Phased Array Ultrasonic
Testing for Pipe Bolt Inspection
Summary